How to remove wallpaper
Learn how to remove wallpaper in this blog post! Our Etobicoke painters have been removing wallpaper in Toronto and the GTA for years!
Follow the steps below to learn how to remove wallpaper:
Step 1: This method requires gloves, safety glasses, a mask and any other required safety equipment. Cover all floors, railings etc. Remove the top layer of wallpaper dry. For this step you want to try to remove the top layer of wallpaper dry by using your fingers and grabbing a bottom corner of the wallpaper and peeling it off up the wall. Have patience and try to remove the entire sheet off in one pull (very satisfying if you can do it!). If you can’t grab a corner with your fingers use a putty knife or similar tool to get the corner going and then pull. If you can’t get the top layer off then move on to step 2.

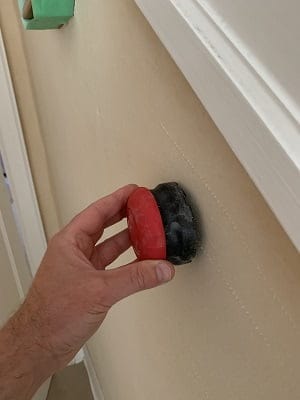
Step 2: Now that you have removed the top layer you will be left with a brown paper underneath with adhesive holding it to the wall. In order to get the solution that dissolves that adhesive underneath the brown paper (or even if you couldn’t get the top layer off and are still left with the original wallpaper) you have to score the paper with a tool called a paper tiger. This tool leaves little nicks in the paper and allows the solution to get underneath and dissolve the adhesive. Don’t use a lot of pressure on the tool or you will leave little nicks all over the wall underneath which you will have to plaster afterwards. Run the tool lightly over the walls.
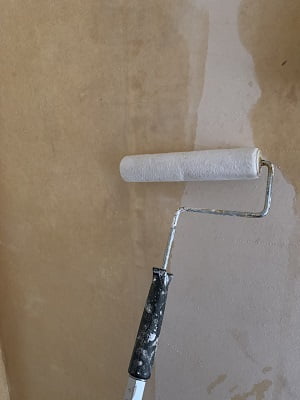
Step 3: Mix up a solution of concentrated DIF wallpaper remover or its equivalent in a bucket big enough to fit a paint roller cage and sleeve into. Have a couple of empty spray bottles and fill them up from the solution in the bucket. Spray the corners and also where the wallpaper meets the ceilings and trim. Then roll the big areas using a 5mm roller sleeve on a cage. Our painters usually only dip the roller only halfway up the sleeve, if you just dunk it in the bucket you’ll probably make a mess. Start halfway up the wall and roll up with the roller to remove excess solution. The adhesive will reactivate if allowed to dry so keep the area you are working in wet at all times. The trick here is to let that solution work for you so we usually completely spray and roll the area we are working in 3 times before attempting actual wallpaper removal.
Step 4: You are now ready to remove the brown paper and adhesive using a wallpaper scraper starting at the top of the wall and scraping the adhesive off at the same time. Have a garbage can near you and make sure to get any bits off the floor before they reactivate! Use clean rags to wipe the adhesive off the wallpaper scraper as you go. Once you complete a section wipe the walls with a sponge in the solution followed by a sponge with clean water.
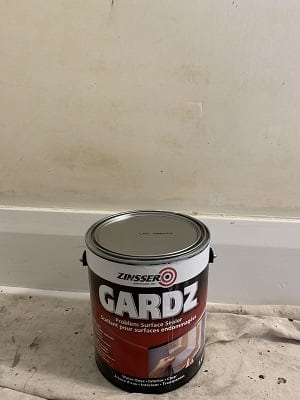
Step 5: Once the walls have dried overnight you can now prime with Guardz or an oil based primer to seal any remaining adhesive residue. We used Guardz on this job and it worked great. It dries clear.
You have done it! Unfortunately there is usually a reason people wallpaper in the first place and that’s to hide imperfections in the wall and poor plastering. Let the plastering begin!
Call Court-Hampton Painting for all your painting needs in Etobicoke, Toronto and the GTA!
